Sunday 13 May 2012

Evaluation

As a final blog entry, I'm going to write about some of the things that went well during the project, that could have gone better and that I've learnt from this experience. I'll also include what to expect and not to in my dissertation, and why it was/wasn't achieved.

INITIAL IDEA

Because I was very torn from the beginning of the project of what to include in my dissertation, I went with something that would be more difficult, detailed and interesting compared to my horse model last year. I knew I wanted to work with a single model, preferably in Mudbox as I enjoy that process a lot. I also wanted to do something involving a greater conceptual process, as this is ultimately what I would like to do as a profession.

My first choice was the Shishi lion. I'm not entirely sure why I picked this. I just thought it would be both more interesting and tricky to make compared to my horse, and because I made something very organic last time, the shishi would be more challenging because it was an organic model but as a statue.

As I hit the concept stage, it hit me that I had in fact chosen a very shallow subject, and I couldn't involve much conceptual design because of this. I discussed this with Rob, and agreed that a broader concept, such as dragons, would work better in order for me to get involved in the conceptual process more.

RESEARCH

After getting the thumbs up with my plans, I started researching dragons and all that they mean. There was a lot of information about all the different types of dragons, so I quite quickly had to start narrowing it down to include only a certain sub-species of dragon. Most of the information I came across seemed contradictory, and most of it was quite obviously made from separate individuals own beliefs. I tried to gather the most believable and reliable information in order to hopefully create a realistic dragon as a result.

CONCEPT

Because of the change of plans, I hadn't quite got to the stage I was supposed to be at in time, and it felt like I needed to rush the concept stage a bit on this one, which was a shame. There was a lot more I could have added, given the extra time, and I would have loved to spend a lot more time drawing different dragons and types and making up my own ones.

I did however feel that the overall outcome of the conceptual design turned out good, and I got a good idea of the process. The link between research and conceptual design also became very apparent to me, as most of the designs were based on what I had discovered during my research.

MODEL

The process of making the basic model in 3ds Max probably took the longest. There was also a huge pause in the middle during which the model didn't progress much, and it took a while getting back into the routine afterwards. Because I'm not too good at working with 3ds Max and modelling, I used a lot of tutorials and books to guide me through the process. They saved me a lot of time, and I feel like I learnt quite a few helpful techniques from it all as well, which is always a nice feeling.

Because of my insecurity with the program, I did make some mistakes and errors along the way. Sometimes these were easy to correct, others took a lot longer. I also realised too late that I didn't in fact need to add all the individual spikes along the spine in 3ds Max (which took many days), but I could have used a simple vector displacement map in Mudbox instead and saved a lot of time and effort.

MUDBOX

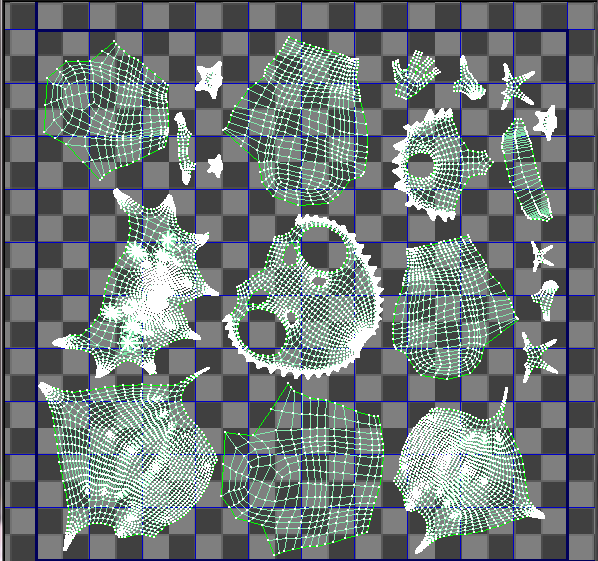
The whole process of sculpting details and painting in Mudbox was done relatively fast compared to the modelling stage. Having used Mudbox only once before, there was still a lot I could have done differently, and what hindered me the most was the computer's capacity. I wasn't able to sculpt to the high level of detail as I would have wanted because of these limitations. I was stuck at 4m polys at the most - which isn't a very high level of detail when you need to add miniature details to the model - with most of the polys located near the head and in the spikes. This meant that the body and wings mainly lacked topology. The next subdivision level would have been at over 16m polygons, as each poly is divided in 4 to keep the quad count, and 16m is too high to work with. 8m polys is the standard level of subdivision, which would have allowed me to add double as many details as I did, but there was no way of me to do this without redoing my model.

There were also some performance issues with some of the filter effects, and some of the paint was bleeding into areas it shouldn't have, but due to the tight time restriction, I couldn't sort them out.

WHAT WENT WELL

Overall, I think I'm pretty happy with how it all turned out. I was sure I bit off more than I could chew when I suggested modelling a dragon, but to my own surprise, I managed to pull it off in the end!

1. Modelling: I was amazed by how well the modelling part went even due to my inexperience. I managed to add spikes, wings, UV pelt maps and topology counts, which I have never done before, and I learnt a lot of new techniques and helpful tricks from doing this.

2. Timing: Even though my time management was way off on this one, I managed to complete it all to as high a standard as I set at the very beginning. I didn't take any shortcuts, and while I was sloppy in some areas, the model would still be usable even in a game engine or exported back to 3ds Max.

3. Looks: I'm quite surprised at how accurate I managed to keep the modelled dragon to the drawn concept. Only a few minor changes took place, such as the addition of spikes along the spine and the underbelly scales. Otherwise, the build is pretty much how I imagined, and the colour/markings were kept as close to the original as I could.

WHAT COULD HAVE GONE BETTER

There were a lot of aspects in the project that didn't go according to plans, mostly due to my own faults, but sometimes also due to technology or lack of it.

1. Time Management: Okay, so I was way off in sticking to my original time schedule. It was mostly due to other projects taking priority over this year-long project, but it was not really an excuse for not updating blogs more often. However, it wasn't really possible to only spend a couple of hours at a time working on the model, as I usually worked on my model alongside watching tutorials at the same time. I didn't take into account how much time the other projects would take up, and their priority compared to this one.

2. Model detail: As explained before, I wasn't able to sculpt the amount of details onto the model as I would have wanted. I learnt from last year's Mudboxing to even out my topology in order to get higher level of detail in all areas and not just a certain area, but due to the wings and spikes, it was difficult to do this for my dragon, and the detail on the head naturally made this area more dense for details. I could have added more edge loops and such even when in Mudbox, but because of the wings/spikes, this was near impossible as well.

3. Technical issues: There were several technical issues when working with the model that hindered me in some ways, mostly when working in Mudbox. These were usually noticeable when stepping up and working in the higher subdivision levels at 4m polygons. Even though this is a perfectly reasonable level of polys for Mudbox to use, the computer struggled a lot when performing certain tasks, especially posing. Even posing in low subdivision levels proved hard, as I still had to step back up into the highest one when rendering screenshots. There were also some issues with bleeding topology on the edges of the wings, probably from turbosmoothing such a narrow area, but it did provide some difficulty issues in making it less obvious. Some filters were unusable for no apparent reason, and whilst they weren't necessary for the model as such, they would have been nice to include to enhance the overall look. There was also some stretching of paint in certain areas, such as the horns, probably due to the cramped UV map, and I should probably have wrapped them separately rather than including them with the head.

WHAT I'VE LEARNT

1. Conceptual process: I thought it was a really good and valuable experience to try out the conceptual process in a bit more detail, as none of the modules actually cover this. I learnt how important the right research can be, and the impact it has on the final outcome.
2. Preparing a model: Because my model wasn't prepared properly (UV mapping, poly count, topology, density etc) I came across several issues which could have been prevented had I done it correctly and thought ahead. I now know how important it is to keep these factors in mind at all times to prevent future mistakes.
3. Know your program: Because I was watching the tutorials as I covered those parts of the model at the same time, I didn't know beforehand what exactly the various programs could do, especially Mudbox. I didn't want to watch all 17 tutorials in one go, as I was afraid I'd forget a certain part, so I watched those concerning sculpting while I was sculpting myself, painting while I painted, posing later on etc. This proved to work pretty well at the time, but had I watched through all the tutorials while I was still working in 3ds Max, for example, I would have known not to add the spikes, how to properly prepare the UV and so on. A lot of useful little hints were also mentioned in the very last parts of the tutorial set, which I watched through at the very end of the project. These would have been quite helpful at the beginning of the project, as they included setting up UVs, resetting topology, inserting edge loops and other very useful techniques. But now I know for next time at least.

Overall, it was a very useful experience and I learnt a lot along almost every stage of the process.

Friday 11 May 2012

Final Update 5 - 11 May

This last week has been spent in Mudbox, sculpting and painting my model. I'm not going to go into any more detail about the process there. I do however enjoy working in Mudbox because of the similarities it shares with painting programs such as Photoshop, especially because Mudbox makes full use of a very handy layers system. Even when sculpting, the tools you use remind a lot of the brushes in Photoshop. You can adjust both size, strength and falloff on these brushes just as you would in Phothshop. Many other features in Mudbox are also the same, such as dodge/born, clone, adjusting hue and blending layers (multiply/soft light etc).

Below are some WIP shots of the modelling process.

Basic head with only slight muscles added.

Some basic shapes added around eyes and mouth.

Final level of detail with scales and horns.

Body with some added body structure.

Final muscular build.

Added neck/belly scales and head details.
 For the scale detail, I couldn't find a suitable stamp/stencil to use, even when looking in the Mudbox community. Because the scales would appear along the whole of the dragon, I wanted them to look similar, like a repeated pattern. So I created my own stamp with one of the new features in Mudbox 2012, the vector displacement maps.

The shape of a single scale was created on plane in a new document using the standard sculpting brushes.

A new plane was imported, and by extracting the texture information from the original plane, I was able to create a vector displacement which could be used as a stamp. The stamp would allow me to paint the all at once where I wanted to, rather than painting every single one of them by hand. It also allowed for more detail to be preserved and used.

Scales added to the dragon model.
With the model fully sculpted and detailed, it was time to add some lights in order to create some more convincing highlights and shadows. One directional light represents the light source while another with lower intensity and a blue tone made up the shaded falloff. An image-based light was also added to create another blue-ish falloff to add some light to the shadows.

I then went on to adding colour and textures to the model. These were done according to the concept sheet as closely as possible. Painting is very similar to painting in Photoshop - many settings and tools are the same, and layers work wonders here too.

Base colour added.

With the aid of layers, The rest of the colours could be put down/erased/modified in separate areas.

I was also able to export the UV map to Photoshop where I could add detail straight onto it. This made it easier to add colour to remote areas, or just add smaller details.
I was also able to save a selected view from Mudbox in Photoshop and directly edit it there. The file was saved and updated instantly in Mudbox via the amazing integrated connection between the two programs. This made it so much easier to add smaller details in the exact areas I wanted.

Head with added detail.

Final look of the dragon!
 Once I was completely happy with how the dragon looked, I could start looking into the science of posing my model to make it look less static and more "alive". The pose tools in Mudbox are very handy and easy to use while being very powerful. Unfortunately, I wasn't able to use them to their full potential. Because of the spikes, horns and wings, I couldn't quite get to all the areas I wanted to pose, and my laptop couldn't quite handle posing it (it took half an hour just to turn the head a tiny bit!). Luckily I was able to pose my dragon slightly at least in between my computer crashing on me.

The pose tool is very powerful and allows you to rotate the selected areas in all axis. You can also link several joints together to create a bone structure for more precise posing. You can also save poses and quickly switch between these.

Finished model!
With the model finally sculpted, painted and posed, I could start taking capturing the final renders. In the panels for the head-light, I enabled shadows at a 4k x 4k resolution to get some really nice and crisp shadows. I also enabled the bias to get some nice shadows in the more secluded areas. I would have enabled both depth of field, ambient occlusion and cavities, but for some reason the program wouldn't let me, and my whole screen just went black, so I had to leave those options toggled off. It annoyed me quite a bit, because ambient occlusions is very important in renders to give that extra bit of depth to the model.

Apart from some full body and head renders, I also made a short turntable movie to show off the dragon from all sides. The background for this is unfortunately plain black, even though I tried to change it. It's nothing major, but I would have preferred something a bit lighter or gradient.

I will be making two "beauty-shots" of the model, one portrait and one full body. This basically means they will be post-processed in Photoshop and touched up to appear more visually appealing.

I was hoping to use actual 3D environments to display the model in for these beauty-shots, and I managed to download a personal learning edition of Vue 10. After looking through hours of tutorials and setting up my first scene, I rendered a quick preview image. The small print for the PLE did state that "renders may be watermarked and carry a logo", but that didn't prepare me for what the render would actually look like!

With the render being completely cluttered with watermarks, it was useless to even try to use it to display my work, and I had to scrap that idea completely. It was disappointing as I would have wanted to create my very own 3D environment to show off my dragon in, but I will have to just rely on my painting skills to come up with something suitable instead!

Saturday 5 May 2012

New Start! 5th May update

Now that all other projects are completed, I can finally focus all my energy and time on the dissertation project. I am aware that I am way behind schedule, according to which I should already have sculpted, painted, lit and fully rendered my model in Mudbox. Unfortunately, even though I was very careful in my planning, I hadn't anticipated that the other projects would require so much of the time. Because I wanted to complete these projects to as high a standard as I possibly could, they all needed so much more time than what was given in the weekly schedule, so for the past month I physically haven't been able to do anything else than work non-stop on the projects from 10 in the morning til 12 in the night to ensure I'm 100% happy with them! So even though I'm far behind schedule at the moment, I'm quite determined to catch up and meet the deadline with a product I'm pleased with.

Having said that, I started working on the model again Thursday the 3rd May. I went back to 3ds Max to put in those final tweaks before exporting it to Mudbox.


In 3ds Max, I made the final adjustment to the snout (which I extended a bit) and the wings. The wings were bent using the rotate and move tools, as well as using the bend modifier. Because I haven't used this modifier before, I had a bit of a struggle to get it working the way I wanted it, but in the end the wings bent the right way at the right place. However, I had to keep all the polys of the wings selected the whole time when moving around the modifier stack, otherwise it would add the bend modifier to the whole of the dragon instead of the specific area of the wing. That problem was fixed once I collapsed all later on.


The following thing to do was to make sure that there were no tris or N-gons in the geometry. Because the way Mudbox subdivides all geometry, you are not allowed to have any tris or N-gons, or Mudbox simply won't load your model. After much research on the wonderful web (and some very useless comments of "redoing your model from scratch" or "find them by eye") several people seemed to have mentioned the 2010 features in the Graphite Modelling tools called "Quadrify". I was eager to test this feature myself, but to my disappointment I saw no change in either the geometry or the poly/tri count when using it. So I had to assume it didn't work.

After searching through the majority of the features in 3ds Max, I remembered about the STL Check modifier, but it didn't do what I wanted unfortunately. I also managed to find ways of selecting N-gons and open polys via the Selection feature, and whilst it didn't offer a way of finding tris, it helped greatly in finding other problems, especially the open edges and N-gons. It highlighted the affected areas nicely, and I was able to go to them and correct them without any problem.

Still not having found any way of searching for tris, I continued looking on the web for any answers. Several hours after I had started the whole tri/N-gon search, I found one very useful comment about the Selection feature. A tab to the very right side of the list, "by numeric", let me select polygons according to how many sides they had. I could insert the value myself, or just use the more/less than 4 options to search for tris and N-gons. To my relief, it came up with 0 polygons, and the amount of 4-sided polygons matched my overall poly count, so I was finally able to claim my model clean!
I added a simple unwrap UV modifier to the model to generate a UV template, as this is needed to paint and sculpt in Mudbox. Remembering that I had only used a very basic "Flatten UV map" on my horse model last year, I was hoping I could get away with the same for my dragon. Unfortunately, it wasn't that easy. I tried to search the internet for any hits on this exact error, but I only managed to find a few, and the problems raised in those topics weren't the same as what I had. So I went back to 3ds Max and tried several different mapping options with different settings and distances, and I still don't know why none of them worked.

Because I couldn't think of anything else to do, I tried to sort out the UV template by pelt mapping my whole dragon. I'd never used pelt mapping before, but after looking at some tutorials I started to get the hang of it. The default seams (green) set by the UVW modifier were pretty much useless, and I had to create completely new seams (blue) by hand according to where I would add the pelting.
I decided to do the legs, feet, body, wings, neck and head all separately. Because the UV template doesn't have any significance in Mudbox later on when you paint, it didn't matter if the various elements weren't the right size or shape, or arranged for easy texturing. The seams were added with the "point to point" option, which lets you add seams along any edge in your model.

After an area had been separated from the rest of the model, I used the "exp. faces el to seams" option. This automatically selected all faces within the area created by the newly added seams. I chose "Pelt", which opened up a new window like above.

By selecting the stretcher, I could adjust the size and direction of it to allow for a smooth pelt stretching without any overlapping polygons.

Once I was happy with the look of the stretcher, I chose "start pelt". This stretched the polygons out in the direction of the stretcher, making sure that all polys were exposed. I could also edit the location of the vertices individually, which was very important on the body parts that included spikes and horns, as these were too condensed with detail for even the stretcher to clear properly.

By committing a pelt mapped area, it was added to the UV template. I arranged them outside of the active tile for now to give myself plenty of space.

Once the process was repeated for the whole dragon, I arranged the template by choosing "pack UV" from the tools tab in the menu bar. The whole process, even though it was roughly done as quick as possible, took about 5 hours in total, and I still didn't know if it would even work. I double-checked for inverted or over-lapping  faces from the select tab in the menu bar. I crossed my fingers as I exported it to Mudbox.

Success! The file opened without problems in Mudbox, and it was now ready for me to start sculpting. Unfortunately it was already too late in the night to start anything, and I still had to watch through the 16-part tutorial of using Mudbox first. This was just to re-cap on anything that I had forgotten since last year.
 
So far, I've done the majority of the main muscle definitions and body structure, which should just leave the smaller details and textures. Unfortunately it's a lot more difficult to sculpt my dragon compared to my horse last year, because I don't have any good references to go by and most of the time I'm just adding muscles and definitions wherever I see fit, not necessarily where they would be. More on the progress later!