This last week has been spent in Mudbox, sculpting and painting my model. I'm not going to go into any more detail about the process there. I do however enjoy working in Mudbox because of the similarities it shares with painting programs such as Photoshop, especially because Mudbox makes full use of a very handy layers system. Even when sculpting, the tools you use remind a lot of the brushes in Photoshop. You can adjust both size, strength and falloff on these brushes just as you would in Phothshop. Many other features in Mudbox are also the same, such as dodge/born, clone, adjusting hue and blending layers (multiply/soft light etc).
Below are some WIP shots of the modelling process.
 |
| Basic head with only slight muscles added. |
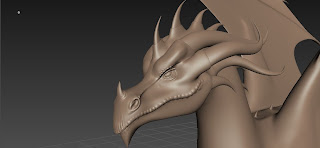 |
| Some basic shapes added around eyes and mouth. |
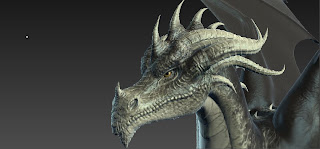
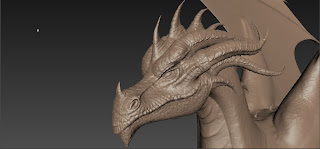 |
| Final level of detail with scales and horns. |
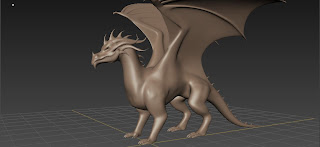 |
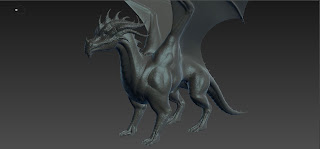
| Body with some added body structure. |
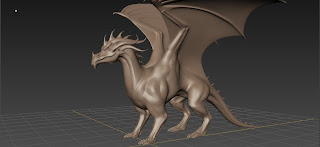 |
| Final muscular build. |
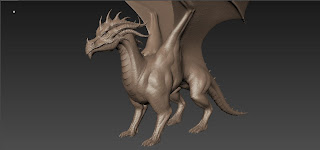 |
| Added neck/belly scales and head details. |
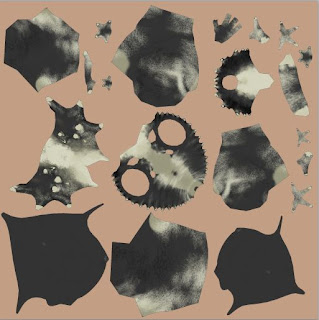
For the scale detail, I couldn't find a suitable stamp/stencil to use, even when looking in the Mudbox community. Because the scales would appear along the whole of the dragon, I wanted them to look similar, like a repeated pattern. So I created my own stamp with one of the new features in Mudbox 2012, the vector displacement maps.
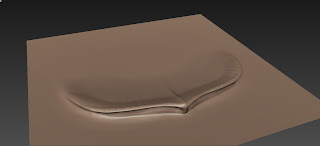 |
| The shape of a single scale was created on plane in a new document using the standard sculpting brushes. |
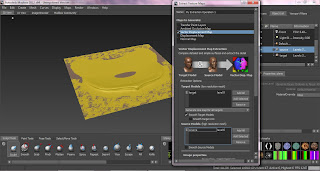 |
| A new plane was imported, and by extracting the texture information from the original plane, I was able to create a vector displacement which could be used as a stamp. The stamp would allow me to paint the all at once where I wanted to, rather than painting every single one of them by hand. It also allowed for more detail to be preserved and used. |
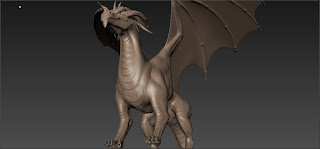 |
| Scales added to the dragon model. |
With the model fully sculpted and detailed, it was time to add some lights in order to create some more convincing highlights and shadows. One directional light represents the light source while another with lower intensity and a blue tone made up the shaded falloff. An image-based light was also added to create another blue-ish falloff to add some light to the shadows.
I then went on to adding colour and textures to the model. These were done according to the concept sheet as closely as possible. Painting is very similar to painting in Photoshop - many settings and tools are the same, and layers work wonders here too.
 |
| Base colour added. |
 |
| With the aid of layers, The rest of the colours could be put down/erased/modified in separate areas. |
 |
| I was also able to export the UV map to Photoshop where I could add detail straight onto it. This made it easier to add colour to remote areas, or just add smaller details. |
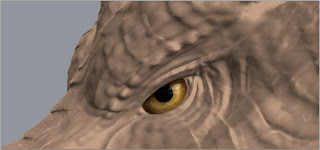 |
| I was also able to save a selected view from Mudbox in Photoshop and directly edit it there. The file was saved and updated instantly in Mudbox via the amazing integrated connection between the two programs. This made it so much easier to add smaller details in the exact areas I wanted. |
 |
| Head with added detail. |
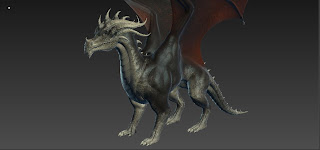 |
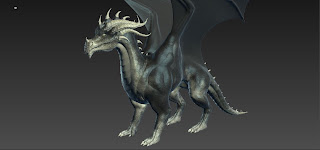
| Final look of the dragon! |
Once I was completely happy with how the dragon looked, I could start looking into the science of posing my model to make it look less static and more "alive". The pose tools in Mudbox are very handy and easy to use while being very powerful. Unfortunately, I wasn't able to use them to their full potential. Because of the spikes, horns and wings, I couldn't quite get to all the areas I wanted to pose, and my laptop couldn't quite handle posing it (it took half an hour just to turn the head a tiny bit!). Luckily I was able to pose my dragon slightly at least in between my computer crashing on me.
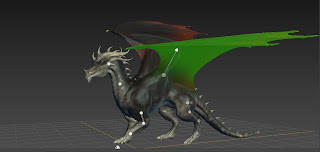 |
| The pose tool is very powerful and allows you to rotate the selected areas in all axis. You can also link several joints together to create a bone structure for more precise posing. You can also save poses and quickly switch between these. |
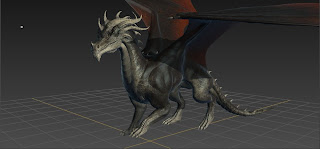 |
| Finished model! |
With the model finally sculpted, painted and posed, I could start taking capturing the final renders. In the panels for the head-light, I enabled shadows at a 4k x 4k resolution to get some really nice and crisp shadows. I also enabled the bias to get some nice shadows in the more secluded areas. I would have enabled both depth of field, ambient occlusion and cavities, but for some reason the program wouldn't let me, and my whole screen just went black, so I had to leave those options toggled off. It annoyed me quite a bit, because ambient occlusions is very important in renders to give that extra bit of depth to the model.
Apart from some full body and head renders, I also made a short turntable movie to show off the dragon from all sides. The background for this is unfortunately plain black, even though I tried to change it. It's nothing major, but I would have preferred something a bit lighter or gradient.
I will be making two "beauty-shots" of the model, one portrait and one full body. This basically means they will be post-processed in Photoshop and touched up to appear more visually appealing.
I was hoping to use actual 3D environments to display the model in for these beauty-shots, and I managed to download a personal learning edition of Vue 10. After looking through hours of tutorials and setting up my first scene, I rendered a quick preview image. The small print for the PLE did state that "
renders may be watermarked and carry a logo", but that didn't prepare me for what the render would actually look like!
With the render being completely cluttered with watermarks, it was useless to even try to use it to display my work, and I had to scrap that idea completely. It was disappointing as I would have wanted to create my very own 3D environment to show off my dragon in, but I will have to just rely on my painting skills to come up with something suitable instead!


No comments:
Post a Comment